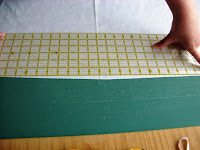
This is MY WAY for this pattern, I have been doing this pattern this way for many years now, I have never even read any of the books on this subject, of which I know there are many. I like to do it my own way. You of course can go and buy the books and make lots of various other designs this way. But just look at patterns that have a swirl in the centre, and there you go. Have fun.
Find pretty – or not! – Fabric with a fairly largish design on it that repeats at regular intervals, this is to save wastage.
The repeats will match more efficiently if you use the lengthwise of the fabric. Width-ways you may have to jiggle it a bit to make it identical which will give you grief later at the cutting stage. I was told once by a fabric manufacturer that the repeat is always more accurate lengthwise, and this has proved right in lots of things I have used made and needed accurate matches. Any waste between the repeats can be used for other projects, or sashings or binding, there is always something to do with it. Hair for a doll even, why not!
OK fabric chosen washed and pressed? You know that makes sense. Let the fun begin.
I have cut myself a 9 ½” square to use for the Magic Star part of the square. You can choose yourself what size to use, it is very easy to draft.
I lay this square on the fabric in different areas and chose to go for the NOT so obvious, I have chosen to use slightly off skew, You will chose what you prefer of course. Just remember it will look nothing like the fabric when finished.
Using a fade away pen I drew round the square directly onto the right side of the fabric where I had chosen my square to be.
Now I have to tell you I cut the length of the fabric all the way down to the end so I only had that thinnish strip in front of me instead of the yardage...
I now need to cut out SEVEN more identical squares, I place the original square on top of the fabric strip and run round with the rotary cutter each time, you may be more comfortable using scissors. CAN YOU SEE IT?
HERE IT IS
Each set of EIGHT squares will give you EIGHT blocks. The cutting out part is the slow laborious boring part of this patchwork but the end results are truly justified by it. Wait and see.
Right, 8 identical squares now cut out, turn them over and take one at a time and press with hot iron, one on top of the other making sure you have the design the right way round, RIGHT SIDE FACING YOU
WRONG - one is up-side-down
RIGHT - you just can't see the whole block in this picture!!!
PRESS firmly to make them kind of 'bond' together...
Oooo now using a rotary cutter with a NEW blade in it – trust me – you need to cut all your squares. I am comfortable cutting through the eight layers, you can separate them if you wish into two sets of four, just make sure you have them the right way round when cutting….
Cut through the Middle, Horizontally and Vertically then corner to corner.
This yields 8 sets of 8 triangles,
Pin each of these sets before you go any further.
Clear yourself a space and take one set of triangles open out and lay out as shown
Pretty Huh? BUT wait. Turn the triangle the other way round, you will get a different design doing this,
You just then have to choose which way you wish one to choose, either way it doesn’t matter to the finished block. Do this to every set of eight as you make the blocks up, you are often surprised at the difference in the design you get. It only takes a minute to do. I laid mine on its background fabric and opted for this way round. The background fabric is actually lilac!!!!!
Now you have made your decision pin back together then get your background fabric and cut one 9 ½” square or whatever size it is you have opted to make. Cut as you did the patterned fabric right side facing you, this gives you enough for TWO blocks. The second shape you need is a rectangle [oblong] with a 45degree angle one end. See diagram below.
When you draft out your pattern you do not add seam allowances to anything, it fits as is. You must just remember to cut with the fabrics right side facing you at all times, if you cut on the fold you will get the reverse shape, which is no good for you in this case.
OK all set to assemble. After all the above it is now going to take you but a few minutes to put together one block. If only you could get some other Muppet to do the cutting out for you!!!! Hmm mm!!
Lay the whole block out right sides up to the side of your machine, or if doing it by hand, to the side of your hands – hahahaha
Look at the block carefully, you want to assemble in the best way, so take a pattern triangle and a plain triangle and join on short side, put back in its place when sewn, do the other three triangle + triangles, then do the other pieces, patterned triangle with the rectangle lopped off end piece, sew, place back, do other three. Are you with me still?
Just a word of caution, as you pick the pieces up to sew make sure you DO NOT turn them as the design will be wrong. Been there done that!!!
You should have four squares now, press the seams towards the background fabric, then join the top two squares then the bottom two squares, press the seams again, the long centre seam will ‘tell’ you how it wants to lay, let it go the way it wants, saves grief later.
Now last press on the front and Voila, one block done. How easy was that, but OH how effective!
As I said the cutting takes the time but I am sure you will agree it is worth it in the end.
ENJOY J
Do leave me a message if you found this helpful or even interesting, also if you are going to have a go I would love to see your pictures and maybe put them here if you will allow.
***********************************************************************